YummyOYummy has completed 750 recipes. Woohoo!!!
And this happens to be my 751st post. Thanks to all of you for encouraging me to go on and on.. And to share my happiness on this wonderful feat let me share with you the recipe for the most delectable mutton biriyani!
As most of you know there are two types of biriyani – kacchi and pakki. Kacchi (raw)biriyani involves cooking the marinated raw meat and half-cooked basmati rice together in layers on dum. And the pakki (cooked) biriyani involves cooking the meat and rice separately followed by layering.
I have posted recipes only for pakki biriyanis before as I never had the courage to cook a dum birirani before. I used to think that the meat wont get properly cooked if we don’t use a meat tenderizer. Anyways recently I decided I should no longer be a coward and tried the kacchi mutton biriyani not one time but twice! First time I used good quality tender mutton and the second time with store-bought not-so-good quality mutton. I didn’t use a meat tenderizer both times but they turned out well. The meat of the biriyani with tender mutton of course tasted better but the rice was flavorful in both. It is in fact much easier to cook a kacchi biriyani compared to the pakki once are confident enough. The only thing you have to be careful is adding the salt. But trust me, after 2 – 3 trials, you would master that part also.
Do give this a try for this year’s Christmas or any other occasion. I have some tips below the recipe. Please do read them before trying out this recipe. And please do let me know how it turned out for you!
Ingredients (Serves 6 – 7)
1. Basmati rice – 3.5 cups (Soaked in enough water for at least 30 minutes)
2. Kala jeera / shahi jeera / karim jeerakam – 3/4 tsp, Cardamom – 6, Cloves – 6, Cinnamon stick – 1 inch, broken, bay leaf – 1
Ghee – 1.5 tsp
Salt – To taste
3. Mutton – 1 kg, cut into medium pieces
Yoghurt – 3/4 cup + 2 tbsp
Ginger-garlic paste – 1.5 tbsp
Green chilies – 7, ground to a paste or crushed
Onion – 1 medium, thinly sliced and deep-fried (Remove 1/4 th of the fried onion to garnish later)
Cilantro / coriander leaves – 1/4 cup, chopped
Mint leaves – 1/4 cup, chopped
Turmeric powder – 1/2 tsp
Kashmiri chilly powder – 1.5 tsp
Biriyani masala powder – 2 – 3 tsp Recipe below (powdered ingredients numbered 6)
Cumin powder – 1 tsp
Raw papaya paste (to tenderise the mutton) – 1 tbsp (optional)
Salt – To taste
Oil – 2.5 tbsp
Ghee, melted – 2.5 tbsp
4. Hot milk – 1/3 cup
Saffron – 1 pinch
Ghee – 2 – 3 tsp
Rose water or kewra water – 1 tsp
5. Mint leaves – 3 tbsp, chopped
Cilantro – 3 tbsp, chopped
Fried onion – 1/4 –1/3 cup
Eggs – 5 – 6, hard-boiled
For the biriyani masala powder
6. Green cardamom – 20
Cloves – 16
Whole black pepper corns – 1 tsp
Cinnamon stick – 1 inch, broken
Stone flower (kalpasi/dagad phool) – 3/4 tsp
Nutmeg – 1/4 th
Mace / jathi pathri – 1/2 tsp
Kala jeera / shahi jeera – 1 tsp
Grind the above ingredients numbered 6 in the small jar of a mixie/coffee grinder and use 2 – 3 tsp in the recipe. Store the remaining biriyani masala powder in an air tight container.
Method
1. Combine the ingredients numbered 3 (except mutton pieces) in a large bowl. Taste-check for salt. Add mutton pieces and mix well. Cover with a lid and place it in the refrigerator overnight. Take it out of the fridge, 45 minutes before cooking.
2. Coat a heavy-bottomed pan with 2 – 3 tsp ghee. Add the marinated mutton pieces and spread them at the bottom of the vessel.
3. Soak saffron in 1/3 cup hot milk. Add ghee and rose water / kewra water and mix well.
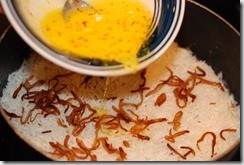
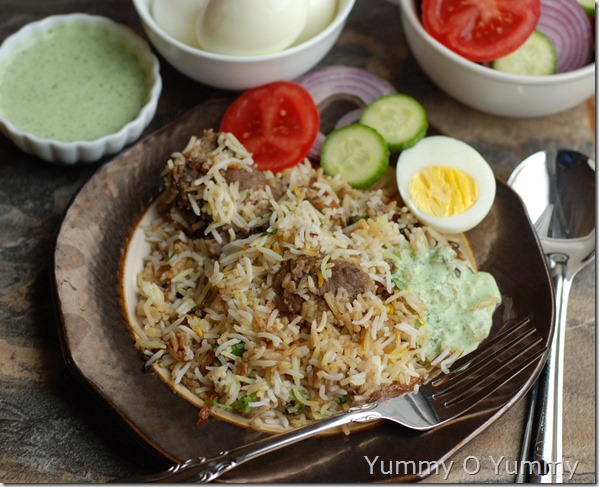
4. To cook rice – Soak basmati rice for 30 minutes and drain well. Boil water in a heavy-bottomed vessel/sauce pan adding all the ingredients numbered 2. Taste-check for salt, the water should be slightly salty. Add drained soaked rice and cook until 50 – 60 % done about 7 – 10 minutes depending on the type and quality of basmati rice you use. Drain well and spread on top of the mutton pieces. Sprinkle saffron milk, fried onions, chopped mint and cilantro on top of the rice. Cover with a tight-fitting lid or cover with a layer of aluminium foil and then place a tight lid on top. Put it on high flame for 6 minutes. Now place a flat tawa on the stove and place the biriyani pot on top. Reduce the heat to medium and cook for 3 minutes. Next reduce the flame to the lowest setting and cook for 40 minutes. Rotate the pot on the tawa every 15 minutes. Switch off the flame after 40 minutes. Let the biriyani pot remain on the tawa for about 20 minutes. Yummy mutton dum biriyani is ready to serve! Open the pot just before serving, mixing gently from deep inside. Garnish with boiled eggs, chopped cilantro, mint and fried onion. Mix gently. Serve hot mutton dum biriyani with boiled eggs, kachumber, raita or mirchi ka salan.
Tips
1. Use good quality basmati rice and tender meat for biriyani.
2. Marinate meat for at least 6 hrs or preferably overnight in the refrigerator after covering with a lid. This ensures that the meat absorbs all the spices well and it also makes your job much easier the next day. Next day, bring the meat to room temperature before cooking biriyani.
3. If the meat in the biriyani is not completely cooked/tender after 40 minutes dum + 20 minutes rest time, cover with lid immediately so that the steam wont escape and set it aside for another 15 – 20 minutes.
4. Adding salt is the only tricky part in a dum biriyani. While cooking rice, please taste-check and ensure that it is a little salty. That way the rice will have enough salt.
5. If the cooked biriyani doesn’t have enough salt, sprinkle some and mix very gently without breaking the rice grains OR add a little extra salt to your raita.
6. In most of the dum biriyani recipes, a dough made using wheat flour and water is used to seal the biriyani pot so that the steam cannot escape out of the pot. Intead of the dough, you can use a tight-fitting lid OR press an aluminium foil over the edges of your pot and place a tight-fitting lid over it.
7. Keeping the biriyani pot on the dosa tawa/flat griddle avoids the meat from getting burnt at the bottom, so make sure that you do it.
8. Use a non-stick biriyani pot or a biriyani handi for this recipe.


Congrats Maya! Now wait is for “1000” post 🙂
Thanks a lot chechi 🙂
Congrats maya 🙂 superb!
How many tsp biryani masala powder do v need to use?
Thanks 🙂
I have listed the ingredients for making biriyani masala powder. I think it yields around 2 tsp
Which biryani pot have u used
Pls post the accompaniments Mirch ka salan recipe too
Sure, will do…
Pls let me know how to cook kacchi mutton in oven- temp & time
Sorry havent tried it in oven..